Showing posts with label What's cooking?. Show all posts

Wednesday, 2 October 2013

Baking history...

The smell of freshly baking bread met visitors to the historic kitchens last month for Heritage Open Day and the Sunday after as Mrs Brown and her volunteers were back in the kitchen cooking up some wonderful breads from traditional recipes.

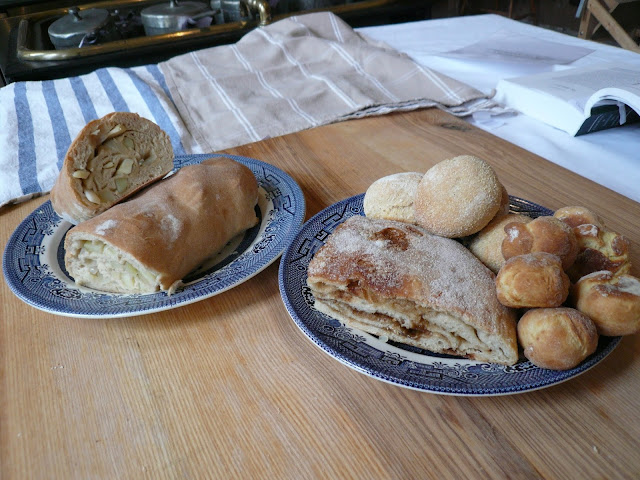
A selection of loaves created in the kitchens, including Cheats's Loaf and Manchet.


Drover's Bread. Traditionally made using beefsteak or mutton, this version was made with potatoes and onion, although any vegetables could be added to vary this bread. Simply roll out 1lb of bread dough, line your chopped ingredients onto the dough and season, before rolling it up into a sausage shape. Seal the ends before baking.


As well as loaves, Mrs Brown made some delicious bread rolls, including saffron cakes, polenta rolls, lardy cakes and tea cakes.

Yummy!

If this has inspired you to bake, have a go at one of Mrs Brown's recipes below and give Paul Hollywood a run for his money!

Sarah
Conservation Assistant

Cheat Loaf
Ingredients
1 1/2 lbs. Wholemeal flour / sieved course bran
3/4 to 1 pint  Warm Water
2 tsp Salt
1 tsp Sugar
2 1/2 tsp Dried Yeast

Method
Put the flour in a bowl, make a well in the centre and add the warm water. Stir to form a batter; cover with some of the flour and leave in a warm place overnight.
Add the yeast and sugar to 1/2 pint of warm water. Stir it before leaving for 15 minutes until frothy. Add the salt and knead everything together for 10 minutes.
Make into a large ball for a single loaf, or divide into 2 - 4 smaller loaves. Place on a baking sheet, cover, and leave until doubled in size.
Bake at 200°C / 400°F / Gas Mark 6 for 45 minutes.


Saffron Cakes
Ingredients
1 lb Flour
4 oz Butter
2 oz Sugar
3 Eggs + 2 Egg Yolks
1/4 pt Milk
1 tbsp Dried Yeast
1/2 tsp Ground Coriander
Large pinch of Saffron

Method
Warm the milk, saffron and sugar together before adding the yeast. Stir and leave, covered, until the yeast froths.
Whip the eggs together for 2-3 minutes; add them to the milk mixture with the flour and ground coriander.
Mix well before kneading on a board.
Once kneaded, place the mixture back into the bowl, cover, and leave to rice for 30-60 minutes.
Knead the mixture for a second time. Split into egg-sized rolls; put onto a greased baking tray, cover, and leave to rise for another 30-60 minutes.
Bake in a moderate - hot oven.


Yorkshire Tea Cakes
Ingredients
1 lb Flour
2 oz Melted butter
1/2 pt Milk
1 Egg
1 1/2 tbsp Fresh Yeast

Method
Rub the butter into the flour. Warm up half of the milk and add the yeast. Make a well in the centre of the flour, pour in the yeast milk and mix together.
Lightly sprinkle some flour onto the surface, cover with a cloth and leave somewhere warm for about an hour for the yeast to rise.
Beat the egg well, add a little salt and some of the warm milk. Add this to the dough and knead it until smooth. Leave to rise in a warm place for another hour,
Divide into 12 pieces, shape into flat rounds, and place on a baking tray. Cover and leave for 15 minutes.
Bake in a moderate oven for 30-40 minutes, not allowing them to brown too much.


Enjoy!


Sunday, 1 September 2013

Jellies, Jellies, Everywhere!

Last week, Mrs Brown and her team of helpers were busy making jellies in the historic kitchens. We started by going back to basics and making the very first type of jelly - a medieval meat jelly - before creating Tudor, Georgian and Victorian fashions. The time and dedication it took to set the gelatine used to make jelly - over ice - as well as the intricate patterns and designs - meant that jelly was a preserve of the rich and was a symbol of wealth and status.
Once you've browsed the gallery below, why not take a look at the Historic Food website for more traditional jelly creations! 

Sarah
Conservation Assistant (and new-found jelly enthusiast)
Visitors to the House on Saturday would have been greeted with the smell of pig as a head and trotters were boiled in order to make traditional brawn and meat jellies! Here Jacky is straining the mixture.
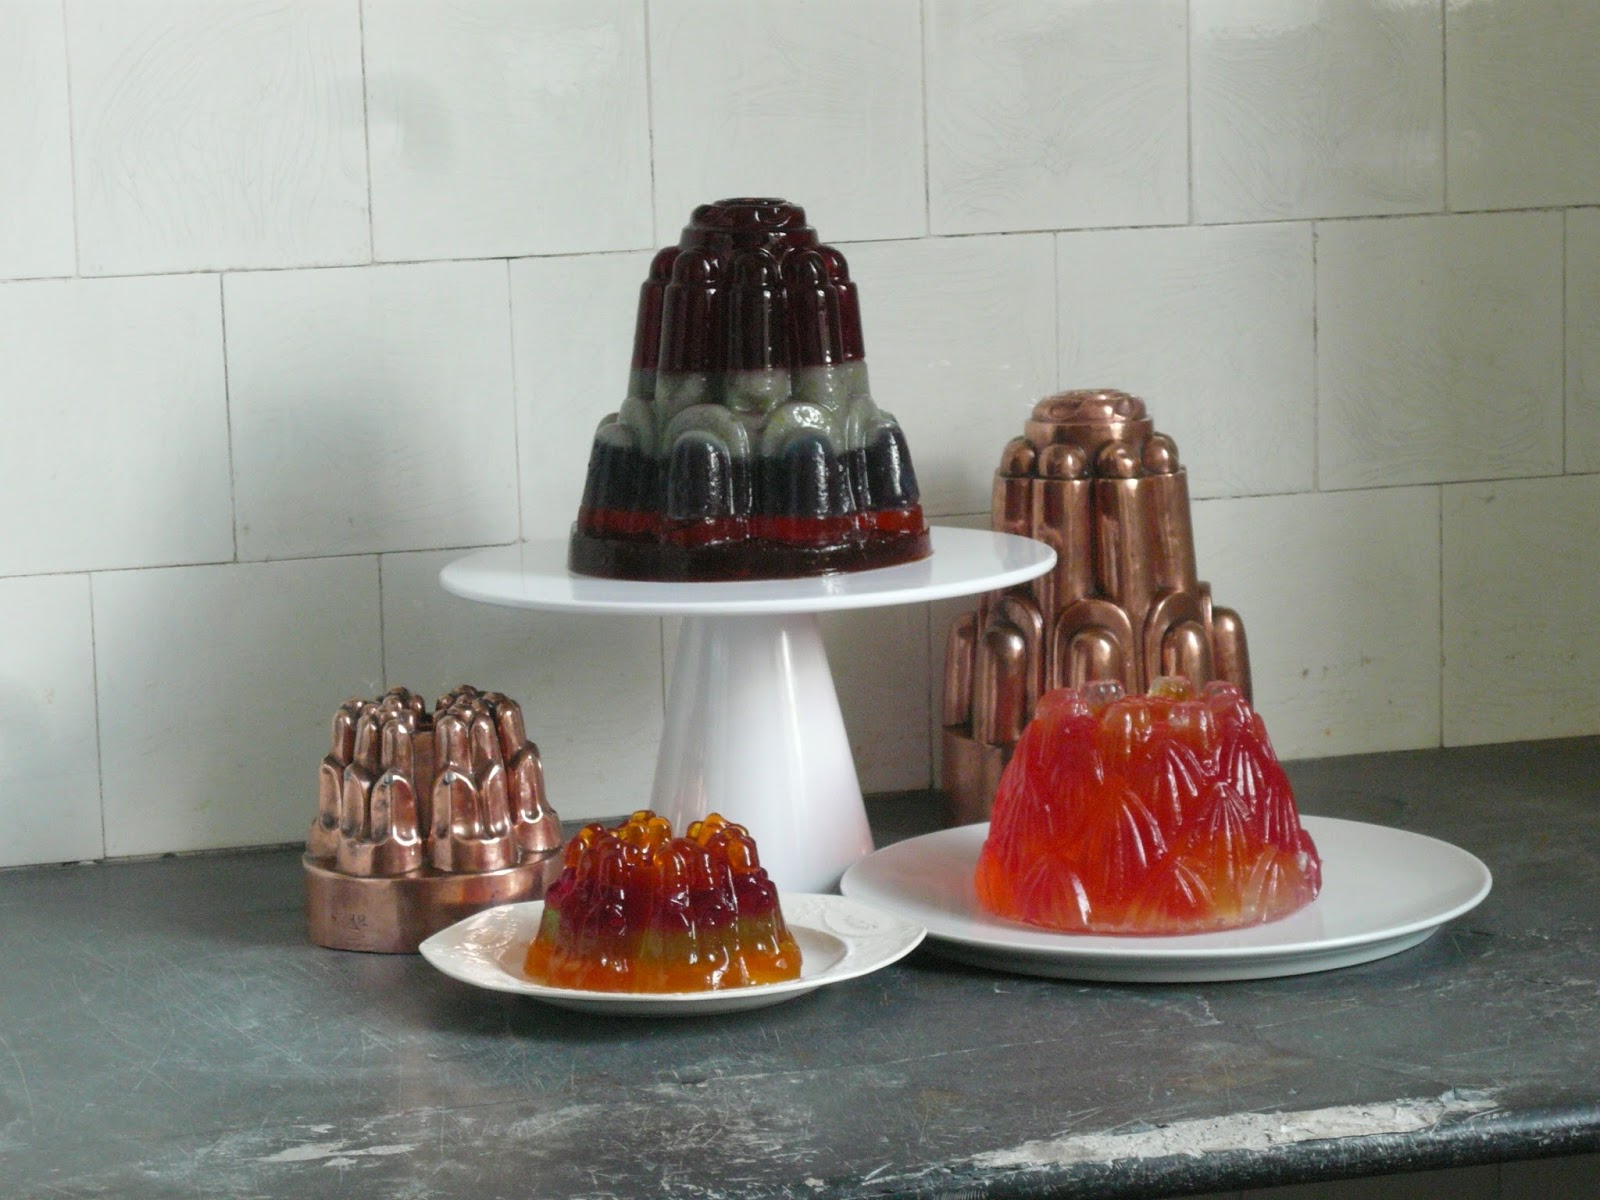
The result of the pig! A traditional meat jelly, set in one of the copper moulds from the kitchens.


Jacky prepares an eighteenth century dish of ham and eggs. An almond milk jelly is set inside emptied egg shells and arranged on a coloured almond jelly that has been chopped up to look like ham...
 
...The finished product was very convincing!

This eighteenth century chequered or 'ribboned' jelly is creating by setting different coloured layers of jelly in turn, before slicing them up, turning them around and resetting them with a clear jelly to create the chequered effect.


Caroline sets different coloured layers of jelly in small glasses...

...resulting in this stunning centre piece! A modern adaptation of a traditional Georgian fashion, where they had specific jelly stands with glasses set into the stand to hold the jellies.
Three different flavoured jellies made using the gelatine from the boiled up pig, including elderflower flavour and orange and cinnamon.
By the end of the week we were very much enjoying playing around with packet jellies and food colouring to create some jazzy effects! The top jelly here was made using a combination of packet jellies and whisked jellies, where we allowed each layer to set in turn before adding the next.

This jelly was made by setting lemon jelly and strawberry jelly in regular jelly moulds, chopping them up and placing some into a more intricate mould. We then poured a clear elderflower jelly around the other colours and allowed it to set. It created a lovely mosaic or stained-glass window effect.
 

Mrs Brown's Stripey Orange Jellies
  1. Cut the top off the orange and scoop out the flesh with a spoon.
  2. Make up some of your favourite jellies according to packet instructions - just don't pour it into the jelly mould!
  3. Take your first colour jelly and pour it into the orange. Put this in the fridge and allow it to set completely before repeating the process with another jelly. Try experimenting with different colours and flavours for different effects!


These impressive jellies are easy to make at home - why not have a go!


Friday, 29 June 2012

Petworth 17th century biscuits

In honour of our 'What’s cooking?' event this weekend, I thought I’d share our recipe for 17th century Petworth biscuits. The traditional recipe is written first, see if you can follow it - it gets a bit tricky so I’ve included the modern translation too! We’d love to see a picture if you have a go.

Ingredients
500g flour
115g butter
115g sugar
1 egg
Milk
2tsp caraway seeds

To Make Bifkits (Biscuits)
To a quart of flour take a quarter of a pound of butter, and a quarter of a pound of sugar, one egg and what caraway –feeds you pleafe.
Wet it with milk as stiff as you can, then roll them out very thin, cut them with small glafs.
Bake them on tin plates.
Your oven muft be flack; prick them very well juft as you fet them in.
Keep them dry when bak’d.

Method
Heat oven to 180 degrees.
Beat butter and sugar until fluffy.
Beat in egg to butter and sugar mixture. Add caraway seeds.
Beat in flour until stiff dough is formed. If it is too stiff, add milk until you get workable dough.
Roll out to 5mm thick and cut out circles either using a cutter or small glass as a guide.
Place on baking sheets leaving spaces between each biscuit, and prick each biscuit with a fork.
Bake in oven until golden brown, around 10-20 minuets, depending on your oven.
Keep in an air tight tin once baked.

Happy baking! Don’t forget to come along this weekend to see Mrs Brown making strawberry and gooseberry jam, shortbread and other traditional treats in the Historic Kitchens.